
Estimated Setup Time: 10–15 minutes
Report Frequency: Daily at 6:00 AM
Email Destination: clientlist@gloveboxapp.com
Requirements: Permission to create, save, and schedule reports in EZLynx
Step 1: Client Report Set Up - 'Policy Master' Report
-
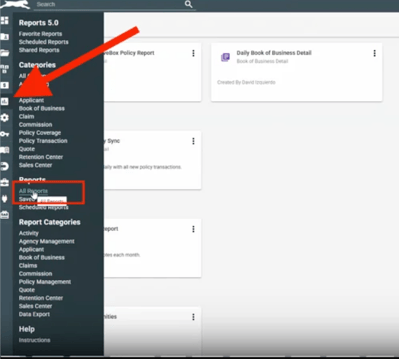
Select the Reports icon from the sidebar, then select All Reports
-
Scroll down to the Book of Business section (purple)
-
Select the Policy Master Report
Step 2: Configure the Report Filters
-
Update these sections:
-
Manage Columns = Select All
-
Policy Status = Active, Inactive
-
- Ensure Select All is chosen for these columns:
-
-
Branch Name
-
Assigned Agent
-
Line of Business
-
Master Company
-
Writing Company
-
Rating State
-
Account Type (looking for the division showing personal/commercial)
-
Step 3: Save the report
-
Hit the View Report button to generate the report
-
Select the Floppy Disk Icon to save it 💾
-
Save the report As:
-
[glovebox agency ID]-[AGENCY_NAME] GloveBox Client List
-
⚠️ Use this exact naming convention to name the report, since this is how it will be emailed to GloveBox:
[glovebox agency ID]-[AGENCY_NAME] GloveBox Client List
- Your GloveBox Agency ID can be found on your GloveBox HQ home page, just under your Agency's name.
- Please use your agency's full name when saving
- Disregard the date range dropdown, nothing is needed
Step 4: Schedule the Report so it comes over daily and keeps your policy holder info up to date in GloveBox
-
Return to the Reports Icon from the sidebar, select Saved Reports
-
Find the GloveBox Report you just created, and hit the 3 dots to the top right of the report.
-
Select Schedule
-
From the Schedule pop-up screen:
-
Copy the Saved Report name and paste this into the Scheduled Report Name
-
Recipient Email: clientlist@gloveboxapp.com
-
Report Format: CSV
-
Frequency: Daily
-
Run On: Please select today's date and an hour or so in the future so we can confirm the set up is working today
-
Hit Schedule
-
You’re Done
You’ve now successfully configured your agency’s EZLynx system to send both Policy and Client data to GloveBox daily. This ensures your policyholders always see the most accurate and up-to-date information.
Need help? Contact support@gloveboxapp.com with any questions