
🧰 What You’ll Need Before You Start
Make sure the following are ready before setup:
| Requirement | Description |
|---|---|
| ✅ EZLynx Access | You must have permission to create, save, and schedule reports. |
| ✅ CRM Admin Access | You’ll need admin rights to “Edit Agency” inside GloveBoxCRM. |
| ✅ Integration Email | The report must send daily to ezlynxsync@better-agency.com. |
🪜 Part 1: Creating and Scheduling the EZLynx Report
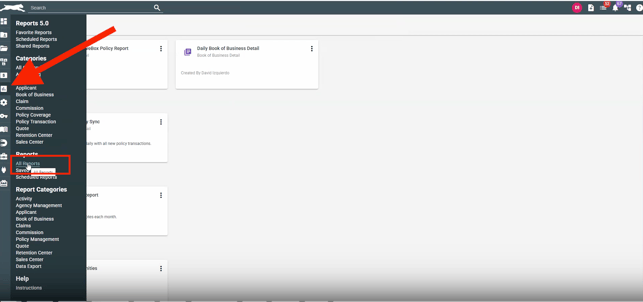
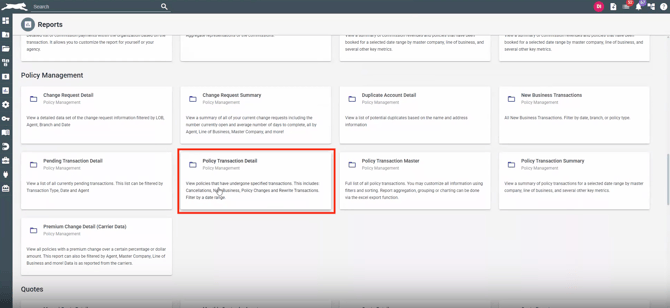
Step 1: Open the Policy Transaction Detail Report
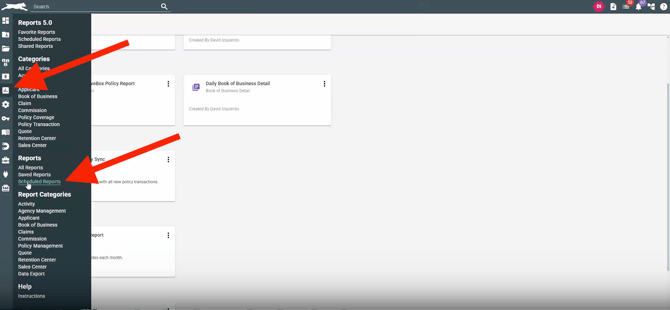
- In EZLynx, navigate to → All Reports.
- Select Policy Transaction Detail.
(If using EZLynx 5.0, this is also under Reports → All Reports → Policy Transaction Detail.)
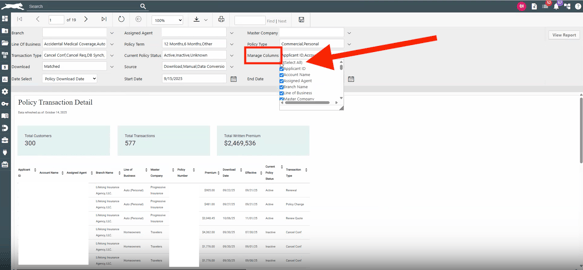
Step 2: Configure the Report Filters
At the top of the report page:
Click Manage Columns → Select All Columns to ensure complete data mapping.
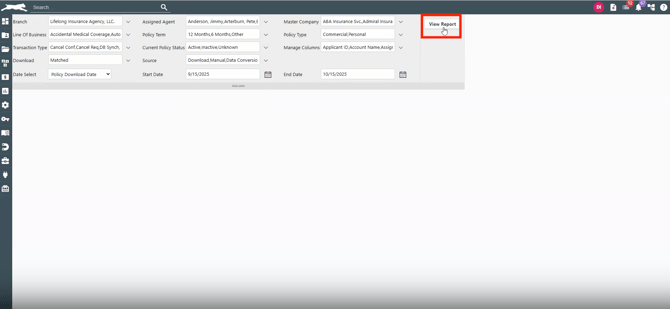
Step 3: Save the Report
-
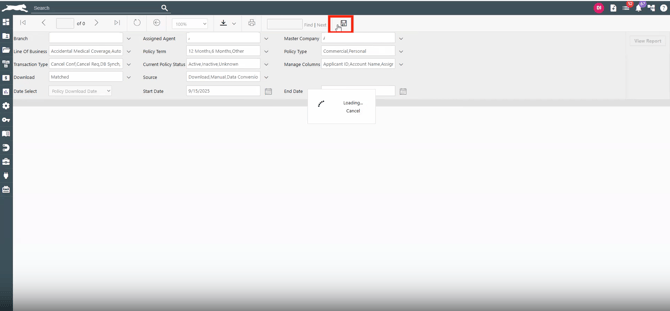
After confirming your filters, click Save
-
Click View Report
-
Then click saving.
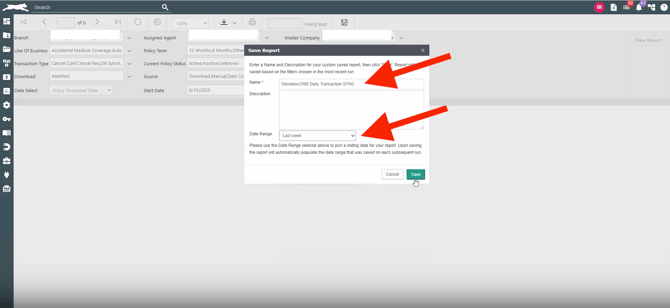
-
A pop up widow will appear and you will need to name the report (GloveBoxCRM Daily Sync) and select “Last Week” for Date Range. Then Save
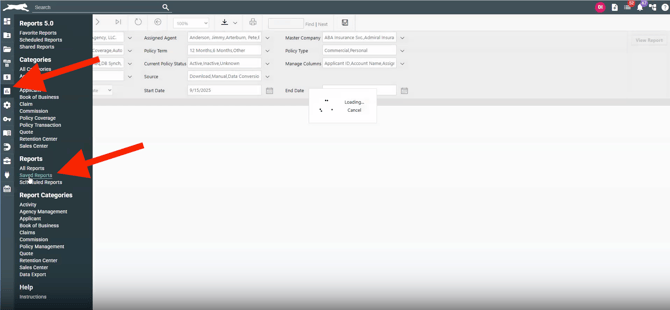
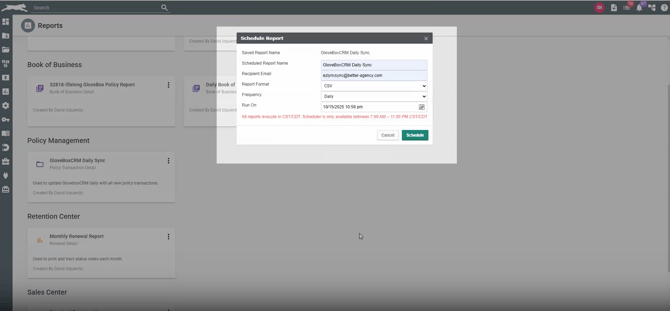
Step 4: Schedule the Daily Report
-
Go to Saved Reports in EZLynx.
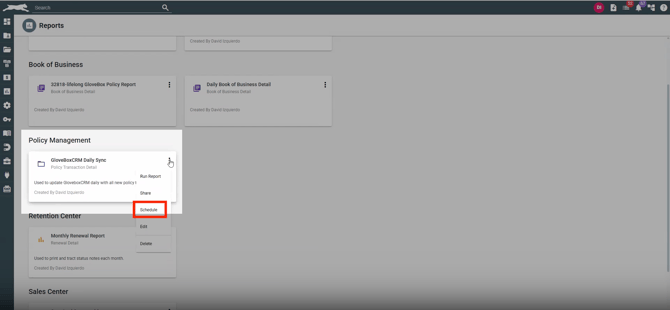
-
Under the header “Policy Management” Locate the “GloveBoxCRM Daily Sync” report.
-
Click the three dots → Schedule.
-
Configure as follows:
- Recipient: ezlynxsynccrm@gloveboxapp.com
- Format: CSV
- Frequency: Daily
- Run Time: 10:59 PM CST/CDT
✅ Pro Tip: Setting to 10:59 PM ensures the report runs before EZLynx’s scheduler cutoff.
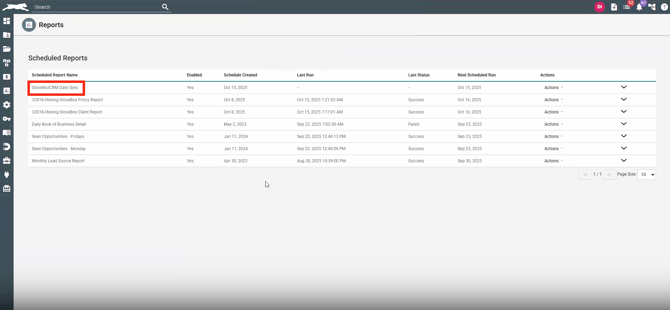
Step 5: Confirm It’s Scheduled
To verify:
-
Navigate to Reports → Scheduled Reports.
-
Check that GloveBoxCRM Daily Sync appears.
🧭 Part 2: Connecting EZLynx to GloveBoxCRM
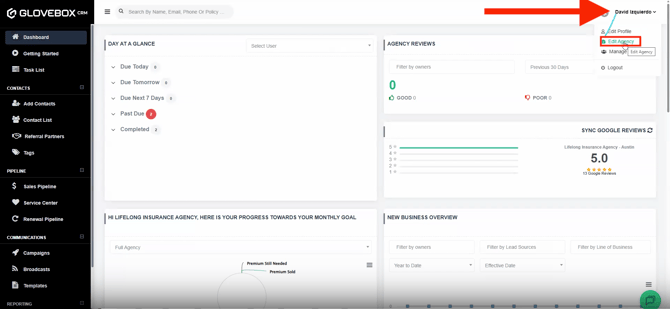
Step 1: Access Your Agency Settings
In GloveBoxCRM:
- Click your name in the upper-right corner.
- Select Edit Agency.
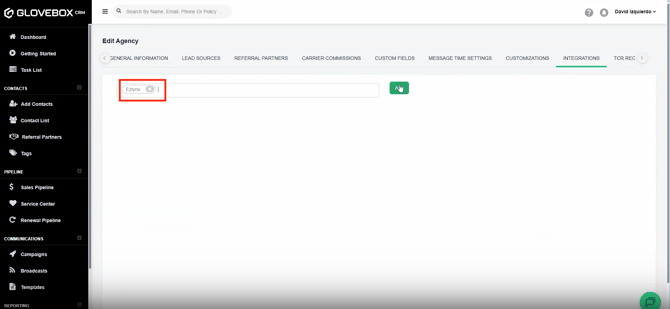
Step 2: Add the Integration
-
Navigate to the Integrations tab.
-
Click Add Integration.

-
In the search bar, type EZLynx and click Add.
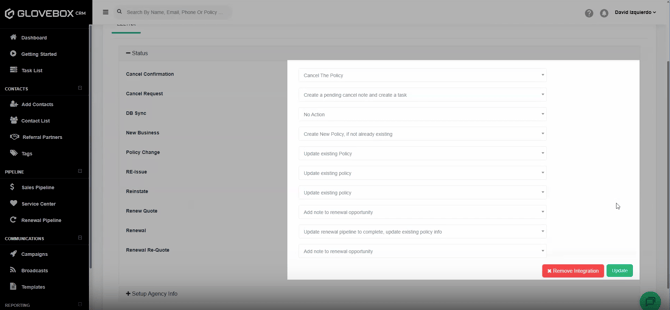
2. Map Policy Statuses and Actions
Carefully map each policy status from EZLYNX to the corresponding action in BA to ensure correct handling during CSV import.
These mappings determine how each policy record is interpreted and processed in BA.
Here are the detailed explanation of the policy statuses:
| Policy Status | Mapped Action | Description |
|---|---|---|
| Cancel Confirmation | Cancel The Policy | Cancels the policy record within the CRM system. |
| Cancel Request | Create a pending cancel note and create a task | Logs a pending cancellation request and generates a follow-up task for manual review or confirmation. |
| DB Sync | No Action | No workflow is triggered; the status is ignored in the CRM. |
| New Business | Create New Policy, if not already existing | Creates a new policy record, provided it doesn’t already exist in the system. |
| Policy Change | Update existing Policy | Updates the current policy record with new or modified information. |
| RE-Issue | Update existing policy | Same as above; typically used when a policy is reissued with the same policy number. |
| Reinstate | Update existing policy | Reactivates a previously cancelled policy by updating its status and relevant information. |
| Renew Quote | Add note to renewal opportunity | Adds a note under the renewal pipeline indicating a quote has been issued. |
| Renewal | Update renewal pipeline to complete, update existing policy info | Marks the renewal process as completed and updates the existing policy details accordingly. |
| Renewal Re-Quote | Add note to renewal opportunity | Logs that a re-quote has been provided for a renewal opportunity, without modifying the policy data. |
Click Update once complete.
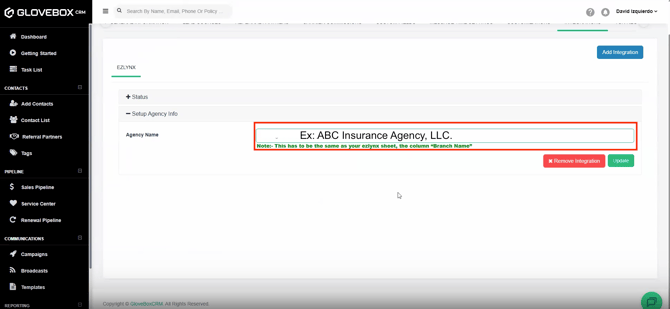
Step 3: Enter Agency Information
- Under Setup Agency Info, paste your agency’s exact branch name from EZLynx.
- Example:
ABC Insurance Agency, LLC. - Be sure to include punctuation and remove any leading/trailing spaces.
- Example:
- Click Update.
⚠️ This name must match your “Branch Name” column from the EZLynx report exactly, or the sync will fail.
4. Submit Configuration
After completing the import and mapping setup, click Update to apply the changes.
📦 Part 3: Exporting Your Book of Business for Initial Import
Before your daily sync begins, you’ll need to manually export your current book of business from EZLynx so GloveBoxCRM can align existing records.
Step 1: Import EZLynx Contacts into the CRM
EZLynx Report: Applicant Detail
Fields to have in your CSV File
- Address_City
- Address_Line_1
- Address_Line_2
- Address_State
- Address_Unit_Number
- This must be combined with Address_Line_2 and imported into the Address Line 2 field in the CRM. GloveBoxCRM has Address Line 1 and Address Line 2. Use a spreadsheet formula to do this in less than 1 minute.
- Address_Zip
- Applicant_ID
- Applicant_Type
- This will help distinguish between types of clients. GloveBoxCRM has 3 imports you can do for Personal & Commercial: Prospect Import, Active Client Import, and Former Client Import. Split your imports into these 3 categories.
- Assigned_Agent
- Must use find & replace to replace with their login email address in the CRM
- Business_Name
- Used for Commercial imports
- County
- Email_Alternate
- Email_OptOut_Primary
- This fields needs to be respected. Either don't import these emails, or opt them out during or after the import process.
- Email_Primary
- First_Name
- Last_Name
- Lead_Source
- Marital_Status
- Nickname
- Occupation
- Phone_Cell
- Should be mapped to Phone 1 on import to be able to send SMS)
- Phone_Home
- Phone_Work
- Relation
- This will identify "Insured" vs "Co-Applicant". The Co-Applicants will need to removed before importing to properly connect the primary insured when import the policy types. After removed Co-Applicants from your spreadsheet, this column can be deleted or ignored during import
Step 2: Import EZLynx Policies into the CRM
EZLynx Report: Book of Business Detail
This report contains the policy data and will linked to the people
- Applicant ID
- Assigned Producer
- First Name
- This field is critical. We use Applicant ID & First Name to find the correct contact. This is because the Applicant ID is shared for the Insured and Co-Applicants on an EZLynx Account.
- If this isn't included from the report, use a formula to pull the first name from the "Account Name" field
- Google Sheets & Excel:
=TRIM(LEFT(A1, FIND(" ", A1 & " ") - 1))Change A1 to the cell of the Account name
- Google Sheets & Excel:
- Lead Source
- Line Of Business
- Master Company
- Policy Number
- Policy Term
- Effective Date
- TotalWrittenPremium
- Address - Line 1
- Importing addresses here would simply overwrite the addresses from the first report, they are not necessary nor recommended. You may desire to import the Address - Line 1 field from EZLynx into the "Policy Title" field in the CRM in order to quickly identify the policy by the address, which is useful for home, renters, property, etc.
Step 3: Import into GloveBoxCRM
- Go to your GloveBoxCRM Admin account.
- From the left menu, add contacts → Import Contacts.
- Upload the CSV you exported.
- Confirm that all columns align correctly.
Once uploaded, GloveBoxCRM will merge and match data to future daily updates sent via the EZLynx import.
✅ Final Verification Checklist
In your EZLynx account
| Task | Status |
|---|---|
| EZLynx “Policy Transaction Detail” report created | ☐ |
| Scheduled daily report to ezlynxsynccrm@gloveboxapp.com | ☐ |
In your GloveBoxCRM
| Task | Status |
|---|---|
| Branch name matches exactly in CRM | ☐ |
| Transaction mappings configured | ☐ |
| EZLynx applicants exported from EZLynx and imported into GloveBoxCRM | ☐ |
| EZLynx policies exported from EZLynx imported into GloveBoxCRM | ☐ |
| Policies updates automatically | ☐ |
💡 Best Practices
- Schedule the daily report late (10:59 PM) to capture same-day updates.
- Avoid renaming CSV columns once mapped.
- Regularly review your EZLynx “Scheduled Reports” tab to confirm success.
- Use your CRM’s “Status” mapping screen to refine automation logic as your process evolves.
FAQs
If no data appears:
- Confirm the report was sent successfully to ezlynxsynccrm@gloveboxapp.com.
- Verify your Agency Name is correct.
- Recheck the report’s columns and transaction filters.
How often does the sync update CRM data?
We receive CSV files from EZLynx agencies daily via email. Our EZLynx scheduler processes these files around 6:00 AM daily, ensuring that all updated account and policy information from the prior day is imported into our system.
What data is synced from the EZLynx scheduled report?
- Personal contact info and Business related information (Phone number, Email, address etc.)
- Personal and Commercial Policies which includes all mapped actions mentioned above
- Notes
- Services
- Custom Fields
- Attachments
- Carriers
- Insurance Types
Do renewals & cancellations in EZLynx update GloveBoxCRM? Do cancellations come over?
Yes, renewals and cancellations do come through in the BA Sync CSV files. Each record includes a policy status field. In our system, we map these statuses to determine how they should be handled.
- If the status is mapped (e.g., renewal, cancellation), the record will be processed according to the user's configuration.
- If the status is not mapped, then no action is taken on those records until the mapping is configured.
Do IVANS transactions get brought in through the EZLynx Sync to GloveBoxCRM?
When an IVANS transaction updates a policy in EZLynx, that change gets tracked on that policy. The EZLynx report that is sent to GloveBoxCRM daily is a collection of those transactions, as well manual policy changes made in EZLynx.
That's how we keep your policies up to date!